Saturday, November 30, 2013

Shine of the times vs Luxe and lush

Not all flaky nail polishes are the same some have big flakes that are more spread out and some have smaller flakes that are clumped together. I only have two flaky polishes and they are two of the most popular ones Essie Shine of the times and China Glaze Luxe and lush. But I wanted to know just how different these two really were so I painted my nails black and put a coat of luxe and lush on (since it was new to my collection) I already had and older picture of me wearing shine of the times over black. 

So lets see the pictures:

Here is essie as you can see it has smaller pieces and more of them:
outside in natural light
Here is the china glaze it has bigger pieces and less of them:


outside in natural light
Here they are side by side in natural light:


  On the nails:

Essie shine of the times over black nail polish.
in natural light
China Glaze luxe and lush over black nail polish.
in natural light
So I really love them both to be honest. Shine of the times is great for all over flaky goodness and I like Luxe and lush for just a little flaky goodness, plus if I wanted to I could do some kind of nail art over the china glaze. 

Well that is all for now. What do you all think? Which one is your favorite?

Talk to you all later,
xoxo Stephanie


Saturday, November 23, 2013

Funfetti Nails

I wanted to do something cute,colorful and easy. So I painted my nails white and I have this chunky glitter top coat that I never used so I figured why not. And I just layered it at the base of my nails and lightly brushed some to the tip. Here is the outcome I love it so much. If you try this I would love to see on instagram use the #bewitchingnails

Talk to you all soon,
xoxo Stephanie 

Thursday, November 21, 2013

Winter foot care

Now I know I don't have the mist beautiful feet in the world but I do like them soft. And who doesn't like soft feet right?

Anyway I thought it would be a good idea to write a post on how I keep my feet soft. I know it says winter foot care but really I do this all year round.

It is picture time:

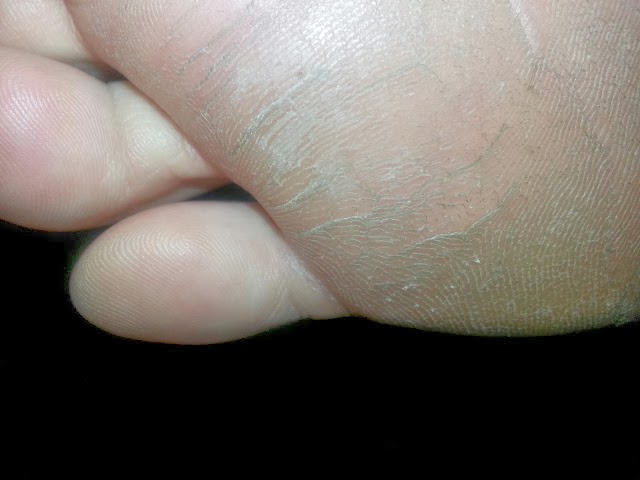
 Here are the bottom of my feet before I start the grating process.

Picture taken with phone

Picture taken with phone


These are the products that I use:


I have tried many lotions and foot creams to help with my feet but none of them worked on my feet like O'Keeffe's . It is a thick paste that you rub over your foot after you shower or before bed .  Side note you don't need to use a whole bunch of this stuff I have been on the same pot for almost a year.


I use the Revlon Pedi-Expert I like it a lot better then the Ped egg because of the metal buffing side. The ped egg has a paper one that on some models you can replace but on the Revlon on it is metal and never needs replacing.

So after my shower I use the grating attachment only if I haven't been caring for my feet as much, then I will buff off the rough bits from grating and finish up with my beloved O'Keeffe's  foot paste put on some thick socks and I am done.

My feet after:
Picture taken with phone

Picture taken with phone

 I put the O'Keeffe's on every night after my shower and I use the Revlon foot scrapper once or twice a month I should use the buffer part once a week but I sometimes forget to be honest. So I hope you all liked this post and it informational if you have tried any of these things or end up tiring any of these products then please let me know.

Until next time talk to you later,
xoxo Stephanie  


Friday, November 15, 2013

Fall Manicure

Hey all just a simple fall gradient manicure this time. I used a dark gold, an orange (that you can't see to much) and two reds a light red and a deep wine red at the tip. Along with a makeup wedge, top and base coat. That is pretty much it it is super simple and super pretty I hope you all enjoyed this one.
Talk to you all later,
xoxo Stephanie

Saturday, November 9, 2013

Nail update and new manicure

I have been growing my nails out for a bit now but they were yellow and stained even though I use a base coat every time. So i buffed my nails off and got some of the yellow off and just to give them a fresh go I cut them. As sad as it was to cut them I knew it had to be done. 

here they are before the big chop and after the big chop
Well now that they were cut I needed a cute nail design to put on them. So I was looking up mint and pink nail art on Google and I found this really cute one from The Crafty Ninja  now I didn't do it that way she did but I did really like the design.
so this is what I came up with

I hope you all like it and if you try it out please show me on either my instagram , facebook or twitter
Talk to you all soon,
xoxo Stephanie

Sunday, November 3, 2013

Galaxy nails with full moon

So I did  galaxy nails awhile ago and well they weren't that great so I wanted to revisit the manicure. I love the way they turned out this time,let me know what you all think.


for the nebula I used a makeup sponge ripped up into little pieces, dark blue,light blue,a raspberry and a yellow nail polish.
I started with a black base and a muilti sized glitter polish for the stars and planets 
Just another look 
for the moon I used a large dotting tool and a white polish I mixed some black in with the white and a smaller dotting tool to get the shading on he moon 

So like I said I really love how these turned out let me know what you all think and if you decide to recreate this then please show me either on instagram , Facebook or twitter . Talk to you soon
Xoxo Stephanie